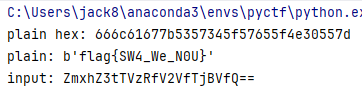
水磨沟区网络与信息安全管理员职业技能竞赛部分WP
webshell分析

日志分析

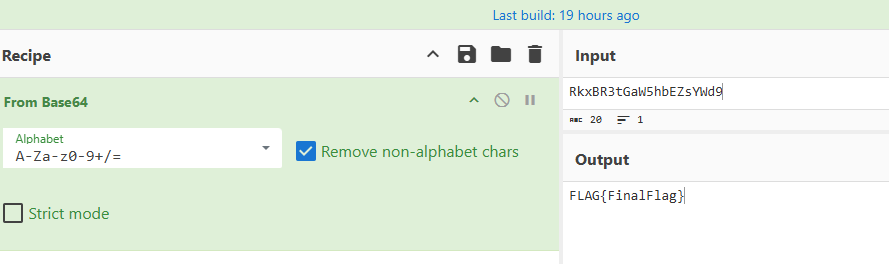
恶意流量分析
发现加密注入参数
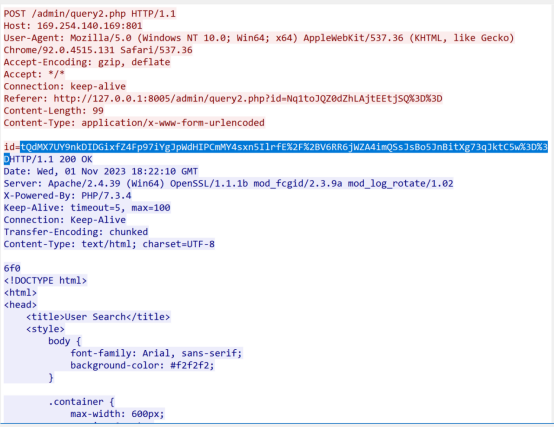
响应页面中包含:
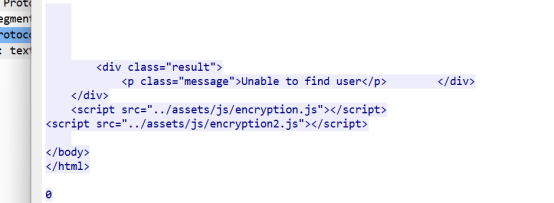
在登录页源码中发现 AES 参数:
const key = CryptoJS.enc.Utf8.parse(‘5366971250864259’);
const iv = CryptoJS.enc.Utf8.parse(‘9111356600987654’);
用 AES-CBC + PKCS7 解密 id 参数,可得到盲注 payload:
1’and ascii(substr((select password from config),1,1))=90#
说明攻击者通过布尔盲注读取了Success的请求,按位置还原得到:
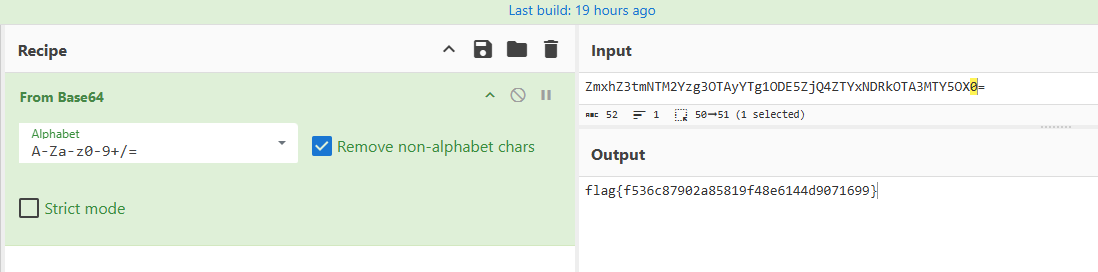
ZmxhZ3tmNTM2Yzg3OTAyYTg1ODE5ZjQ4ZTYxNDRkOTA3MTY5OX0=
不死马清除
删除/var/www/html/.add.php 发现会被重复创建,结束掉 nobody 的两个进程 删除成功
系统后门排查
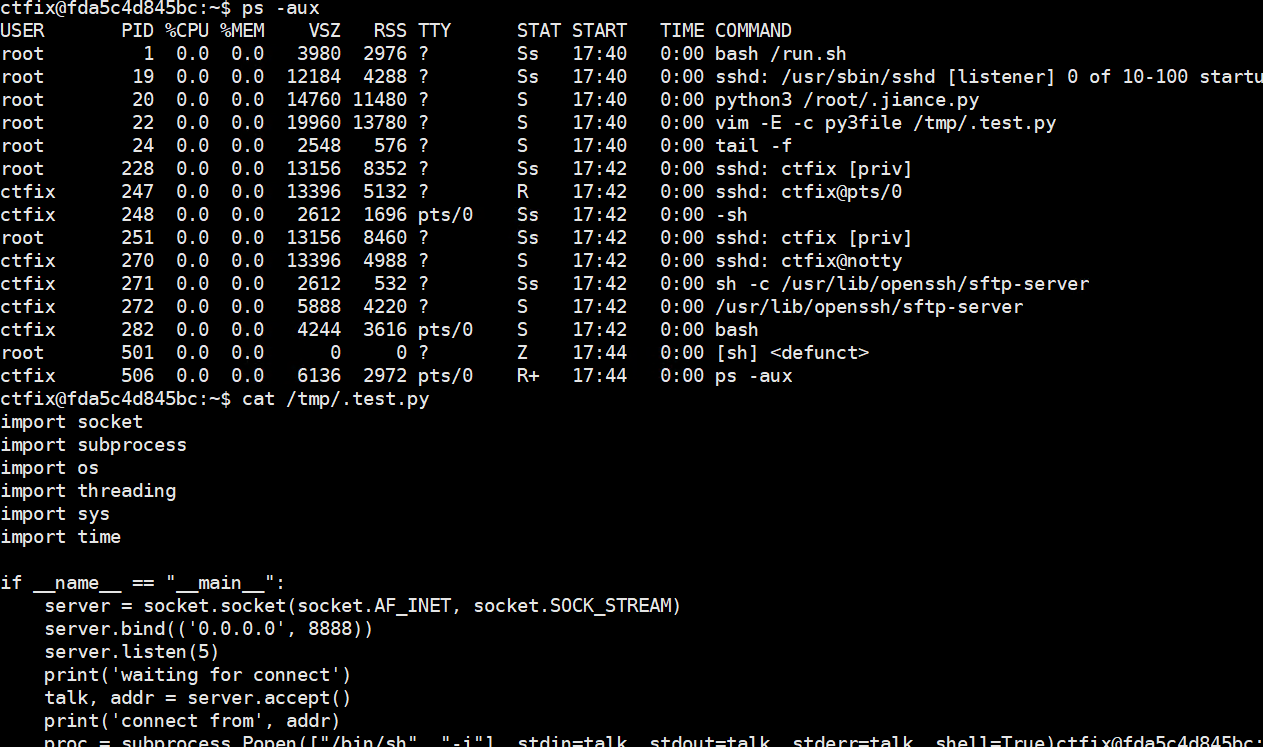

依旧结束进程 删文件
RE
1
2
3
4
5
6
7
8
9
10
11
12
13
14
15
16
17
18
19
20
21
22
23
24
25
26
27
28
29
30
31
32
33
34
35
36
37
38
39
40
41
42
43
44
45
46
47
48
49
50
51
52
53
54
55
56
57
58
59
60
61
62
63
64
65
| from struct import pack, unpack
def rc4(data: bytes, key: bytes) -> bytes:
S = list(range(256))
j = 0
for i in range(256):
j = (j + S[i] + key[i % len(key)]) & 0xff
S[i], S[j] = S[j], S[i]
i = j = 0
out = bytearray()
for b in data:
i = (i + 1) & 0xff
j = (j + S[i]) & 0xff
S[i], S[j] = S[j], S[i]
k = S[(S[i] + S[j]) & 0xff]
out.append(b ^ k)
return bytes(out)
def tea_decrypt_block(block: bytes, key):
v0, v1 = unpack("<2I", block)
delta = 0x9E3779B9
s = (delta * 32) & 0xffffffff
k0, k1, k2, k3 = key
for _ in range(32):
v1 = (v1 - (((v0 << 4) + k2) ^ (v0 + s) ^ ((v0 >> 5) + k3))) & 0xffffffff
v0 = (v0 - (((v1 << 4) + k0) ^ (v1 + s) ^ ((v1 >> 5) + k1))) & 0xffffffff
s = (s - delta) & 0xffffffff
return pack("<2I", v0, v1)
def tea_decrypt(data: bytes) -> bytes:
key = [17, 34, 51, 68]
return b"".join(
tea_decrypt_block(data[i:i+8], key)
for i in range(0, len(data), 8)
)
def main():
with open("chall1.txt", "r", encoding="utf-8") as f:
hex_data = f.read().strip()
cipher = bytes.fromhex(hex_data)
after_tea = tea_decrypt(cipher)
plain = rc4(after_tea, b"just_for_crypto")
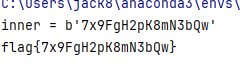
print("inner =", plain)
print("flag{" + plain.decode(errors="ignore") + "}")
if __name__ == "__main__":
main()
|
数据溯源
拿到附件后,先看目录结构,可以发现几个关键文件:
upfile.phplogs/access.log.1698364800httpd.dmpcheckme.exeupload/file.png
这说明题目并不是单纯的代码审计,而是需要结合:
- Web 上传点源码
- 访问日志
- 内存转储
- 可执行程序
进行一次完整的数据溯源。
第一步:分析上传点
查看 upfile.php:
1
2
3
4
5
6
7
8
9
10
11
12
13
14
15
16
17
18
19
20
21
22
23
24
| <?php
if(isset($_POST['submit'])){
$filename = $_POST['filename'];
$filename = preg_replace("/[^\w]/i", "", $filename);
$upfile = $_FILES['file']['name'];
$upfile = str_replace(';',"",$upfile);
$upfile = preg_replace("/[^(\w|\:|\$|\.|\<|\>)]/i", "", $upfile);
$tempfile = $_FILES['file']['tmp_name'];
$ext = trim(get_extension($upfile));
if(in_array($ext,array('php','php3','php5'))){
echo 'Warning ! File type error..';
}
if($ext != 'asp' or $ext != 'asa' or $ext != 'cer' or $ext != 'cdx' or $ext != 'aspx' or $ext != 'htaccess') $ext = 'file';
$savefile = 'upload/'.$filename.".".$ext;
if(move_uploaded_file($tempfile,$savefile)){
die('Success upload..path :'.$savefile);
}else{
die('Upload failed..');
}
}
function get_extension($file){
return strtolower(substr($file, strrpos($file, '.')+1));
}
|
这里有两个关键点:
- 对
php/php3/php5 只告警,不阻止上传
1
2
3
| if(in_array($ext,array('php','php3','php5'))){
echo 'Warning ! File type error..';
}
|
这里只是输出警告,并没有 exit 或 die,所以上传流程会继续执行。
- 扩展名判断逻辑恒成立
1
| if($ext != 'asp' or $ext != 'asa' or $ext != 'cer' or $ext != 'cdx' or $ext != 'aspx' or $ext != 'htaccess') $ext = 'file';
|
这里用了 or,导致条件恒为真,因此最终上传文件总会被保存成:
或者更准确地说,服务端会强制把扩展名改成 file。
这说明攻击者可能上传了恶意文件,但真正关键的是:
- 上传过什么内容
- 落地文件名是什么
- 后续是否还有其他痕迹
第二步:查看访问日志
从 logs/access.log.1698364800 中定位可疑请求,发现 IP 95.214.55.115 的访问非常关键:
1
2
3
4
5
| 95.214.55.115 - - [27/Oct/2023:10:42:21 +0800] "GET / HTTP/1.1" 200 277
95.214.55.115 - - [27/Oct/2023:10:42:21 +0800] "GET /favicon.ico HTTP/1.1" 404 2659
95.214.55.115 - - [27/Oct/2023:10:42:28 +0800] "GET / HTTP/1.1" 304 -
95.214.55.115 - - [27/Oct/2023:10:43:25 +0800] "POST /upfile.php HTTP/1.1" 200 29
95.214.55.115 - - [27/Oct/2023:10:43:27 +0800] "POST /upfile.php HTTP/1.1" 200 39
|
可见这个 IP 在短时间内连续进行了两次上传。
其中:
这和源码中的两种输出非常吻合:
Warning ! File type error..Success upload..path :...
说明这两次 POST 很可能分别对应:
- 一次带有警告的上传
- 一次真正成功并返回保存路径的上传
第三步:从内存转储中恢复上传内容
仅靠日志还不够,需要继续分析 httpd.dmp。
在转储中搜索 multipart/form-data、upfile.php、Success upload 等字符串,可以恢复出两次 POST 请求体。
第一次上传
恢复出的关键信息:
1
2
| Content-Disposition: form-data; name="file"; filename="企业微信截图_16956346424665.png"
Content-Type: image/png
|
这次上传的是一个 PNG 图片,也就是附件中的:
而且内存中还能看到响应字符串:
1
| Warning ! File type error..
|
这说明第一次上传虽然是图片,但服务器执行过程中出现了这段警告字符串。
第二次上传
恢复出的第二次请求体更关键:
1
2
3
4
| Content-Disposition: form-data; name="file"; filename="post.php"
Content-Type: image/png
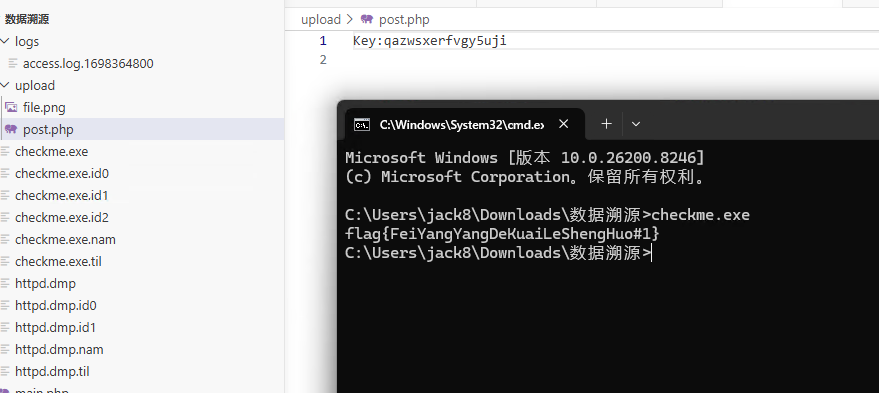
Key:qazwsxerfvgy5uji
|
同时还能在转储中直接看到服务端响应:
1
| Success upload..path :upload/file.png
|
这说明攻击者第二次上传的原始文件名是:
上传内容是:
最终服务器返回的保存路径是:
也就是说,真正需要溯源的核心数据已经从转储里恢复出来了。
第四步:分析 checkme.exe
继续分析 checkme.exe,在可执行文件字符串中能直接发现一条非常重要的信息:
这说明程序真正想读取或校验的目标文件名是:
而不是附件现成提供的 upload/file.png。
因此可以推断:
httpd.dmp 中恢复出的第二次上传内容,才是 checkme.exe 需要的输入- 题目实际上要求我们从日志和转储中“还原原始数据”
第五步:还原目标文件并运行程序
根据转储内容,手动重建文件:
路径:
内容:
然后运行:
程序直接输出:
1
| flag{FeiYangYangDeKuaiLeShengHuo#1}
|
国密算法
1
2
3
4
5
6
7
8
9
10
11
12
13
14
15
16
17
18
19
20
| from base64 import b64encode
from gmssl.sm4 import CryptSM4, SM4_DECRYPT
key = bytes.fromhex("0123456789abcdeffedcba9876543210")
ct = bytes([
0xf1, 0x00, 0x6e, 0xe5, 0xbb, 0x2a, 0x02, 0xa4,
0x53, 0xbc, 0x7e, 0x46, 0x96, 0x02,
0x4c, 0x77
])
sm4 = CryptSM4()
sm4.set_key(key, SM4_DECRYPT)
plain = bytes(sm4.one_round(sm4.sk, list(ct)))
print("plain hex:", plain.hex())
print("plain:", plain)
print("input:", b64encode(plain).decode())
|